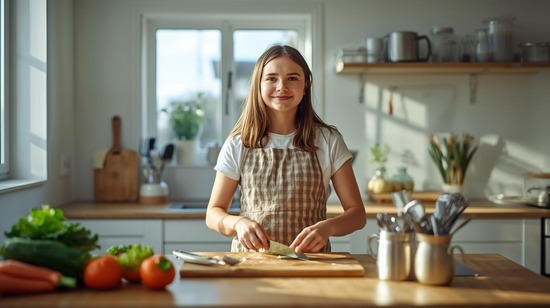
I burned my first three batches of rice, shattered a glass measuring cup, and served raw chicken to my roommate. These 10 skills are what I learned the hard way — so you don’t have to.
My first attempt at cooking dinner for myself was a disaster. I was 19, living in my first apartment, and I decided to make “simple” fried rice. I used fresh rice (it turned to mush), a cold pan (everything stuck), and soy sauce straight from the bottle (poured, not measured — it was inedible). I ate cereal that night and considered cooking a skill I simply didn’t have.
I was wrong. Cooking isn’t a talent you’re born with. It’s a set of specific, learnable skills that stack on top of each other. Once you understand the first ten, everything else is just a variation.
This guide teaches those ten skills. Each one includes exact measurements, the specific technique, the common mistake, and the fix. Work through them in order, and you’ll be cooking real meals within two weeks.
Skill 1: Knife Safety and the Three Cuts That Do Everything
You don’t need to chop like a TV chef. You need three cuts, one safe grip, and a sharp knife.
The Claw Grip (Non-Negotiable for Safety)
Place your hand on the food with fingertips curled under, knuckles forward. Rest the flat side of the knife blade against your knuckles as you cut. Your fingertips never extend past your knuckles. Practice this slowly. Speed comes naturally after 20 repetitions.
Cut 1: The Slice (¼-inch thick)
Use for: Garlic, mushrooms, zucchini, chicken breast How: Hold the knife tip on the cutting board. Lift the handle and slice down in a rocking motion. Keep fingers curled.
Cut 2: The Dice (½-inch cubes)
Use for: Onions, potatoes, carrots, bell peppers How:
-
Slice the vegetable into ½-inch planks.
-
Stack 2-3 planks and slice into ½-inch strips.
-
Turn the strips 90 degrees and cut across into cubes.
Why uniform size matters: A 1-inch potato cube and a ¼-inch cube in the same pot will be raw and mushy at the same time. Uniform cuts = even cooking.
Cut 3: The Mince (fine, paste-like)
Use for: Garlic, ginger, fresh herbs How: Slice thinly, gather into a pile, and rock your knife through repeatedly until tiny.
The microplane shortcut: A $12 microplane grater produces perfect garlic/ginger mince in 10 seconds with zero knife skills.
Skill 2: How to Control Heat (The Make-or-Break Skill)
Most beginner disasters — burnt garlic, raw chicken, rubbery eggs — come from one mistake: wrong heat.
The Heat Hierarchy
Table
| Heat Level | Visual Cue | Use For | What Happens If Wrong |
|---|---|---|---|
| High | Oil smoking, aggressive sizzle | Boiling water, searing steak | Burns garlic instantly, dries out chicken, makes pancakes raw inside |
| Medium-High | Strong sizzle, slight smoke | Sautéing vegetables, browning ground meat | Overcooks fish, burns butter, makes eggs rubbery |
| Medium | Steady sizzle, gentle bubbling | Cooking chicken thighs, grilled cheese, simmering sauces | Won’t burn anything; gives you control |
| Medium-Low | Quiet sizzle, slow bubbles | Scrambled eggs, pancakes, caramelizing onions | Too slow for searing; perfect for delicate foods |
| Low | Barely perceptible movement | Keeping food warm, melting chocolate, slow simmer | Won’t brown anything; won’t burn anything |
The Two Tests
-
Pan too cold: Food doesn’t sizzle when it hits the pan. It just sits there and absorbs oil.
-
Pan too hot: Smoke appears before you add food. The oil smells acrid.
Beginner rule: Start every recipe on medium heat. You can always increase it. You cannot un-burn garlic.
Skill 3: How to Sauté (The Foundation of Flavor)
Sautéing is cooking food quickly in a small amount of fat over medium-high heat. It creates the golden-brown crust that makes food taste like food, not boiled mush.
The Exact Technique
-
Heat the pan: Place skillet over medium-high heat for 2 minutes.
-
Add fat: Add 1 tbsp olive oil or butter. When oil shimmers (ripples like water in wind) or butter foam subsides, the pan is ready.
-
Add food in a single layer: If food overlaps, it steams instead of browns.
-
Don’t move it: Let food sit undisturbed for 2-3 minutes. This creates the Maillard reaction — the chemical process that produces hundreds of flavor compounds.
-
Toss and finish: Stir or flip. Cook 2-3 more minutes.
Practice recipe: Dice 1 onion and 2 garlic cloves. Sauté in 1 tbsp olive oil over medium-high heat for 4 minutes. This is the flavor base for 80% of savory recipes.
Skill 4: How to Boil and Simmer (They Are Not the Same)
Using “boil” and “simmer” interchangeably is why sauces break, pasta turns mushy, and soups taste thin.
Table
| Boil | Simmer | Low Simmer | |
|---|---|---|---|
| Bubble size | Large, rapid, constant | Small, occasional | Barely perceptible |
| Temperature | 212°F (100°C) | 180-190°F | 160-170°F |
| Use for | Pasta water only | Soups, stews, sauces | Delicate sauces, keeping warm |
| What happens if wrong | Breaks sauces, toughens meat, overcooks vegetables | Nothing — this is the goal | Takes longer but won’t burn |
The visual test: A boil looks like a jacuzzi. A simmer looks like occasional bubbles gently breaking the surface.
Why it matters: Boiling a tomato sauce for 20 minutes breaks the emulsion and creates a thin, greasy sauce. Simmering the same sauce thickens it and concentrates flavor.
Skill 5: How to Cook Rice Perfectly (Every Time)
Rice is the most commonly cooked side dish and the most commonly ruined. Here’s the foolproof method.
The Ratios
-
Long-grain white rice: 1 cup rice to 1¾ cups water
-
Jasmine or Basmati: 1 cup rice to 1½ cups water
-
Brown rice: 1 cup rice to 2¼ cups water
The Method
-
Rinse: Place rice in a fine strainer. Rinse under cold water for 30 seconds, stirring, until water runs mostly clear. This removes excess starch that makes rice sticky.
-
Combine: Add rinsed rice, measured water, and ½ tsp salt to a saucepan.
-
Boil: Bring to a boil over high heat. Do not stir.
-
Simmer: Reduce to low. Cover tightly. Simmer 18 minutes (white) or 45 minutes (brown).
-
Rest: Remove from heat. Keep lid on. Let sit 10 minutes. Residual steam finishes cooking.
-
Fluff: Remove lid. Fluff with a fork. Serve.
The “no peeking” rule: Lifting the lid releases steam and drops the temperature. This adds 5 minutes and creates uneven texture. Set a timer and trust it.
Skill 6: How to Cook Pasta Correctly (The Four Rules)
Rule 1: Use a big pot 4 quarts (1 gallon) of water per pound of pasta. Pasta needs room to move. In a small pot, it clumps and cooks unevenly.
Rule 2: Salt the water like the sea Add 1-2 tablespoons of salt per gallon. This is your only chance to season the pasta itself. Unsalted water = bland pasta, no matter how good your sauce is.
Rule 3: Cook 1 minute less than the package says Cook until al dente — tender but with a tiny firm dot in the center when bitten.
Rule 4: Save the pasta water Before draining, scoop out 1-2 cups of starchy water. Add it to your sauce ¼ cup at a time to create a silky, clingy coating. This is the secret to restaurant-quality pasta.
Practice recipe: Cook 8 oz spaghetti in 2 quarts salted boiling water for 7 minutes. Reserve ½ cup pasta water. Drain. Toss with 2 tbsp butter, ¼ cup Parmesan, and ¼ cup pasta water. The starch emulsifies with butter and cheese to coat every strand.
Skill 7: How to Season in Layers (The “Why Is My Food Bland?” Fix)
Underseasoned food is the #1 reason beginner meals taste flat. Professionals season in three layers.
Layer 1 — Before Cooking
-
Salt meat 15 minutes before cooking.
-
Salt vegetables as they hit the pan.
-
This allows salt to penetrate and season from within.
Layer 2 — During Cooking
-
Taste after each major step.
-
Add dried herbs early (they need heat to release flavor).
-
Add fresh herbs at the end (heat destroys their delicate oils).
Layer 3 — At the End
-
Final taste and adjustment.
-
Add acid (lemon juice, vinegar) at this stage to brighten flavors.
The salt guide:
Table
| Food | Amount per serving | When to add |
|---|---|---|
| Pasta water (1 gallon) | 1-2 tbsp | Before boiling |
| Vegetables (1 lb) | ½ tsp | As they hit the pan |
| Chicken breast (1 lb) | ¾ tsp | 15 minutes before cooking |
| Ground meat (1 lb) | ½ tsp | While browning |
| Soup (4 servings) | 1-1½ tsp total | In stages |
The acid secret: If food tastes “missing something” but isn’t bland, add acid, not salt. A squeeze of lemon juice or splash of vinegar at the end lifts every other flavor.
Skill 8: How to Cook Eggs Three Ways (The Beginner’s Best Friend)
Eggs are cheap, fast, and teach heat control. Master these three methods and you’ve learned 60% of breakfast cooking.
Scrambled Eggs (Creamy, Not Rubber)
Ingredients: 4 eggs, 2 tbsp butter, salt, pepper
-
Whisk eggs with salt and pepper until fully blended.
-
Heat nonstick skillet over medium-low. Add butter.
-
When butter foam subsides, pour in eggs.
-
Let sit 10 seconds. Push gently from edges to center with a silicone spatula, forming soft curds.
-
Remove from heat when still slightly wet — they continue cooking from residual heat.
What you learn: Medium-low heat is the difference between creamy eggs and rubber.
Fried Eggs (Crispy Edges, Runny Yolk)
Ingredients: 2 eggs, 1 tsp butter or oil, salt, pepper
-
Heat skillet over medium heat. Add butter.
-
When foam subsides, crack eggs in.
-
Cook 2-3 minutes until white is set and edges are crispy.
-
For over-easy: flip carefully, cook 20 seconds.
What you learn: Patience. The white needs time to set before flipping.
Boiled Eggs (Perfect Every Time)
Soft-boiled (runny yolk): Bring water to boil. Lower eggs gently. Boil 6 minutes. Ice bath 2 minutes. Hard-boiled (firm yolk): Same method, 11 minutes. Ice bath 2 minutes.
The ice bath stops cooking instantly and prevents the gray ring around the yolk.
Skill 9: How to Read a Recipe (Before You Start)
Half of all beginner disasters happen because the recipe wasn’t read first.
The 2-minute read-through:
-
Read the entire recipe from start to finish.
-
Note temperature requirements: “room temperature butter,” “marinate overnight.”
-
Note equipment: Do you need a blender? A 9×13 pan?
-
Note timing: Total time vs. active time. A “30-minute” recipe might require 2 hours of chilling.
-
Note order of operations: Does the sauce get made while the pasta boils, or after?
The mise en place connection: After reading, pull every ingredient out. Chop everything. Measure liquids. Now turn on the stove. This 10-minute prep saves 20 minutes of panic and prevents burnt garlic.
Skill 10: Food Safety (The Non-Negotiable Rules)
You can recover from a burnt sauce. You cannot recover from food poisoning.
The Temperature Danger Zone
Bacteria multiply rapidly between 40°F and 140°F. Food should not sit in this range for more than 2 hours total.
Safe Internal Temperatures
Table
| Food | Safe Temperature | How to Check |
|---|---|---|
| Chicken (all cuts) | 165°F | Thermometer in thickest part |
| Ground beef/pork | 160°F | Check multiple spots |
| Whole beef/pork cuts | 145°F | Rest 3 minutes after |
| Fish | 145°F | Flesh opaque, flakes easily |
Cross-Contamination Prevention
-
Separate cutting boards: One for raw meat, one for vegetables.
-
Wash hands: 20 seconds with soap after handling raw meat.
-
Refrigerate promptly: Leftovers within 2 hours. Store in shallow containers.
The thermometer is essential: A $35 instant-read thermometer eliminates all guesswork. Color is not reliable. Chicken can be pink at 165°F and white at 150°F (unsafe). Use the thermometer.
The 5 Beginner Recipes That Teach Everything
These five recipes each teach a fundamental technique. Cook them in order.
Recipe 1: Perfect Scrambled Eggs
Teaches: Heat control (Skill 2 + 8)
Recipe 2: Simple Pasta with Garlic and Oil
Teaches: Timing, emulsification, finishing pasta in the pan (Skill 4 + 6)
Recipe 3: Pan-Seared Chicken Thighs
Teaches: Browning, thermometer use, resting meat (Skill 3 + 10)
Recipe 4: Roasted Vegetables
Teaches: Oven basics, uniform cutting, high-heat roasting (Skill 1 + 2)
Recipe 5: Simple Fried Rice
Teaches: High-heat cooking, using leftovers, sauce distribution (Skill 3 + 5)
The 5 Most Common Beginner Mistakes (And How to Never Make Them Again)
Table
| Mistake | Why It Happens | The Permanent Fix |
|---|---|---|
| Burning garlic | Added too early, heat too high | Add garlic 30-60 seconds before liquid. Use medium heat. |
| Dry chicken | Overcooked, wrong cut, no thermometer | Use thighs instead of breast. Cook to 165°F. Rest 5 minutes. |
| Bland food | Added all salt at the end | Salt in layers. Taste three times during cooking. |
| Sticky pasta | Too little water, not stirred, rinsed after cooking | 4 quarts water per pound. Stir immediately. Never rinse. |
| Overcrowded pan | Impatience, wrong pan size | Leave space between pieces. Cook in batches. |
FAQ: Beginner Cooking Skills
Q: What is the absolute easiest meal for a total beginner? A: Scrambled eggs. One pan, four ingredients, 5 minutes. It teaches heat control, seasoning, and timing. If you can make perfect scrambled eggs, you can make 80% of breakfast foods.
Q: Do I really need a meat thermometer? A: Yes. It’s the single most important tool for food safety and quality. A $35 thermometer eliminates the “is it done?” anxiety and prevents overcooking.
Q: How do I know if my knife is sharp enough? A: Hold a sheet of paper by one corner. Draw the knife across it. A sharp knife slices cleanly. A dull knife tears. If dull, use a honing steel before every session and get professionally sharpened every 3-6 months.
Q: Why does my food always taste bland? A: Three reasons: (1) You’re not salting in layers. (2) You’re not tasting while cooking. (3) Your spices are old. Ground spices lose potency after 6 months. Replace them or buy whole spices and grind fresh.
Q: Is cooking at home really cheaper? A: For the recipes above, yes. A pan-seared chicken thigh dinner with rice and vegetables costs approximately $3 per serving. The same meal at a restaurant costs $14-18.
Q: How do I get over the fear of ruining food? A: Cook eggs. They’re cheap. If you ruin them, you’re out $0.50 and 5 minutes. Cook 20 batches of scrambled eggs until perfect. By then, you’ll have practiced heat control, timing, and seasoning without financial stress.
Q: What’s the one skill that improved your cooking the most? A: Tasting while cooking — at three stages: after aromatics, after adding main liquid, and at the end. This habit alone transforms food from “okay” to “restaurant quality.”
Final Thoughts
I burned my first three batches of rice. I served raw chicken to my roommate. I made soup so salty it was inedible. Every mistake on this list is one I’ve made personally.
Cooking is not about avoiding mistakes. It’s about understanding why they happen so you can recognize the warning signs and correct course before dinner is ruined. The difference between a good cook and a great cook isn’t talent — it’s the accumulated knowledge of what not to do.
Start with Skill 1. Practice the claw grip and the three cuts this week. Add Skill 2 next week. Within 30 days, you’ll have a foundation that most home cooks never build. And you’ll be cooking meals that you — and the people you cook for — actually look forward to.
The kitchen isn’t scary. It’s just a room with a stove, a knife, and ingredients that want to become dinner. Your job is to learn how to help them.
About the Author
Falak is the founder of Feb Evolve and a home cook who believes that great meals don’t require fancy equipment or culinary degrees. After years of cooking for family and friends, she started this blog to share practical, tested recipes that busy people can actually make. When not in the kitchen, she experiments with food photography and tests new flavor combinations so you don’t have to.